We’re Gonna Need a Bigger Bo…

x…

We need a bigger Box… as in Plyo Box.

You thought I was going to say Boat… we need that too… more on the Bigger Boat later.

Here is a film showing two of our Strength and Conditioning classes… one 7th grade and one 8th grade (we have a total of 5 sections of 8th graders and 3 sections of 7th graders) doing a box jump routine.

We have done this routine 4-5 times this year. The first time we did it, we maybe had 1-2 athletes in each class that could make it up on the “Big Box”.

This time, the final time this year, we had more that could make it up on the box than couldn’t in each class… probably 40-50 total that could do it!

We see the same results in improved Vertical Leap, 40 yard dash and Pro Agility times… not to mention strength levels in our four core lifts of Bench, Squat, Push Press and Hang Clean.

Attribute it to increased strength, or improved confidence, familiarity with the drill, or class cohesion/ competition, maturation…. whatever your belief, the results speak for themselves.

And that is the thing that I have learned teaching Strength and Conditioning at our (Bingham) Middle School…

Whatever you believe and know to be true regarding the advantages of a good Strength and Conditioning program at the high school (or collegiate) level, the same benefits are realized in this age group.

Improvements in…

  • Team Cohesion
  • Strength
  • Confidence
  • Explosion
  • Speed
  • Quickness
  • Training Habits
  • Competing
  • Overcoming adversity

And about that bigger boat…

Just as last year, (We’re Gonna Need a Bigger Boat) the number of students requesting this class is up… approaching 400 students listing Strength and Conditioning as their first PE choice, with only 200 slots available.

Nearly 400 students requesting Strength and Conditioning with the knowledge that it is a tough, strenuous class… with the knowledge that they will be required to (or rather”get to”) train 3-4 days a week.

It is even more evidence that this age group is the exact right time to begin a strength and conditioning program.

Related Posts:

Remember – You Can Do More… your brain is lying to you…. Don’t Believe It!

Jeff Floyd – youcandomore1@yahoo.com

Checking for Understanding

A point of emphasis for all teachers in our school this year has been  “checking for understanding” with our students.   As teachers, we are trying to move away from a strictly lecture format, with the instructor asking at the end of the period, “OK, did everyone get that?”; And with the students thinking to themselves, “No, I have no idea what you are talking about, but I am not about to let everyone know I am confused.”  By the time the final test rolls around, be it the MAP, EOC or any other standardized test, it is too late to check and see it they have “gotten it” or not.

As a coach, it is extremely important that we are doing a great job of teaching important concepts, and that we have ways to “check for understanding” with our players.  We do not want to wait until our final “test”, our contest Friday night, to see if our players have understood a particular concept, play, or defense.  If our players have not “gotten it” by that time, game time, then it is too late.

learning pyramid

Coach Keith Grabowski, Offensive Coordinator at Baldwin Wallace University, had an excellent post last week discussing the Retention of Learning and the “Learning Pyramid”.  In it, he details various ways to improve meetings, play insertion, practice and drill time.  I would like to share and piggyback off of a few of his ideas.  In preparation for Spring Practice, Coach Grabowski had these thoughts:

“With our coaches the message was to make meeting time as interactive as possible and to move away from lecturing and having their players read bullet points off a Power Point (lowest retention rate of learning). Instead, I wanted them to move towards using dynamic content whether that was Power Point diagrams with animations, still shot step-by-step illustrations with coaching points, film or preferably a combination of those things.   I encouraged our coaches to make the meetings as interactive as possible: Ask questions, have a player demonstrate, have them all stand up and show exactly the footwork or hand placement we expect. Don’t just allow the players to be passive learners.”

Yesterday, I used a play from Coach Grabowski’s playbook in my Advanced Strength and Conditioning Class.  We were evaluating video tape of their Power Clean technique. I used film from our previous class day, which I had exported to Hudl.  As each student’s clip came up, they were given the instruction to “Coach themselves and the rest of the class, focusing on 1) Power Position 2) Explosion Phase and 3) The Catch.”

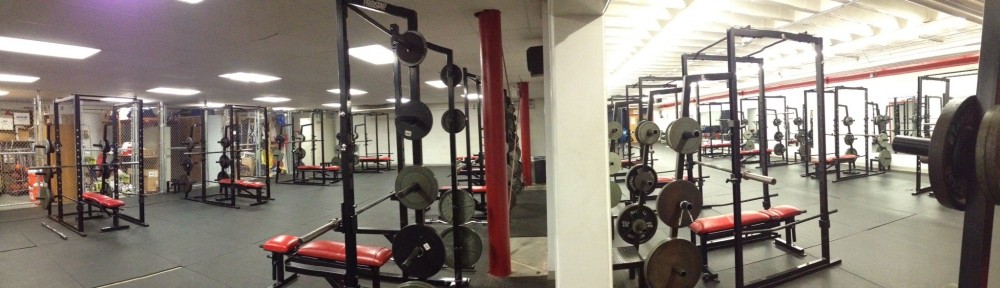
We normally would do this in our Lecture Hall where it is a little more conducive to this type of teaching method, but it was being used.  We had to “monitor and adjust” and set up a film viewing station in our weight room.  Here is a clip showing one student-athlete going through this process.  The quality of the film is a little rough, but you can see and hear what is going on:

Coach Grabowski also discussed the benefits of making a screencast (or screen recording) of a presentation:

“I also encouraged them [coaches] to use our editing system to prepare video walk thru – essentially a screen cast of them talking through a play and giving coaching points. I like this method for an install because your comments as a coach are saved and accessible for player review later, whereas if you just talk through video in a meeting, once the meeting is over, there is nothing for the player to refer back to.”

My post yesterday , Making a Screen Recording, details how to make a screencast, or screen recording.

Coach Grabowski also took this philosophy out to the practice field:

“I also believe that our coaches do a great job organizing and preparing their practice drills and periods to be efficient and effective. As the learning pyramid shows, this has a 75% retention rate. The biggest area I encouraged both our players and coaches to improve on was having the players coach each other. I want every player not involved in the drill to be coaching and helping his teammates. I want the players to develop a coach’s eye for proper technique. I want them to understand and be able to see exactly right versus almost right.”

“To facilitate this I asked our coaches to follow a simple procedure:
1. Name the drill they are working and give the exact coaching points (being very efficient with language) that they are looking for.
2. The players should then be looking for those coaching points being executed by their teammates if they are waiting their turn.
3. They should also work to use the precise language that the coaches use. In all we do, we want to be able to communicate a coaching point in one to three words.”

You can see my thoughts on organizing practice drill work at this post: Running an Effective Drill

By implementing technology and insisting on interactive teaching and coaching methods from his coaches and players, Coach Grabowski is “checking for understanding” on a daily basis in the Baldwin Wallace football program.  Which instructional methods from the Learning Pyramid are you using to teach your student athletes in the classroom, in the weight room, or on the field?

Thanks to Coach Grabowski for providing a daily dose of great information via his blog: Coach and Coordinator.  You can follow Coach Grabowski on Twitter @CoachKGrabowski.

Questions and Comments are always welcome!

Jeff Floyd – youcandomore1@yahoo.com

Going Until “Failure”

joyTypically on our “Heavy” day lift (Monday-Bench, Tuesday-Squat, Wednesday-Push, Friday-Clean) we go until “failure” – meaning we go until we can’t do any more reps using correct technique and/or without spotter help.  Going to “failure” is probably not a very good term to use, because it implies that the athletes themselves have failed.   It puts a negative thought into their head before they even step under the bar.  I prefer that the athletes focus on “breaking” (Breaking…. It’s a Good Thing!),  rather than failure.

When an athlete does a particular exercise until failure, they personally have not failed, it is just that particular muscle group has “failed“… is exhausted… cannot do another rep.  I think that it is important that the athlete understand that this is a good thing; that IT (not being able to continue) is not, nor are they, a failure.   Without pushing this threshold they would not get appreciably stronger.

Author Seth Godin discussed the idea of welcoming difficulties in his post, “Just the good parts,” last week:

“You don’t get to just do the good parts. Of course. In fact, you probably wouldn’t have chosen this path if it was guaranteed to work every time.

The implication of this might surprise you, though: when the tough parts come along, the rejection and the slog and the unfair bad breaks, it makes sense to welcome them. Instead of cursing or fearing the down moments, understand that they mean you’ve chosen reality, not some unsustainable fantasy. It means that you’re doing worthwhile, difficult work, not merely amusing yourself.

The very thing you’re seeking only exists because of the whole. We can’t deny the difficult parts, we have no choice but to embrace them.”

Training… daily, hard,  intense, consistent, physical, training… is tough… is reality.  It means you’re doing worthwhile, difficult work, not merely amusing yourself.    You have to do the hard stuff, not just the good parts,  to be great.  Embrace the difficult parts.

Questions and Comments are always welcome!

Jeff Floyd – youcandomore1@yahoo.com

Changeup – Power Clean

power cleanAs a changeup (Throwing a “Changeup”), about once a month, we substitute the Power Clean for the Hang Clean in our weekly workout.   There is not a great deal of extra teaching involved with the lift; most of the technique and instruction is the same as Hang Clean.  The starting position is different, so most of our coaching deals with getting into the proper power position at the beginning of the lift.

We like this as a changeup because it helps teach the position we want the athletes to get into at the beginning of the hang clean.  At the beginning of the explosion phase of the Hang Clean (The Core Lifts – Hang Clean) sometimes the athletes have a tendency to bend too much at the waist, consequently using the back instead of the legs to complete the lift.  By teaching a good power position (starting position) on the Power Clean, it reinforces the position we want the athletes to be in at the start of the explosion phase of the Hang Clean.

The athletes should begin with their knees over, toes under the bar.  This will get the bar close to their body where it should remain throughout the lift.  They should have good bend in their ankles, knees, and hips.  Their hips should be down, with their shoulders back, and head slightly elevated.

We teach that the movement will begin slowly, with the bar accelerating as it reaches the area around the knees.  From this point on, the lift is identical to the Hang Clean.

Below is a telestrated video (with audio) of athletes displaying varying degrees of technique.

Questions and Comments are always welcome!

Jeff Floyd – youcandomore1@yahoo.com

Navigating the Workout Card

I was up the other night thinking about a better way to introduce and explain our Excel based workout card within the limitations of this blog format.  Typically, the first day we introduce the workout card to our student-athletes (or coaches) we use a projector with a laptop.  The session involves walking through both visually and verbally how to read and manage their personalized workout card.  I have found that trying to explain the card via this blog, by just typing out an explanation can get pretty wordy, and the diagrams, just being pieces of the entire card, are not as clear as what I would like.

To solve this problem, I figured out how to make a screen recording, with audio (I will have a post about this later – it is a pretty slick trick, especially when making recordings of your Hudl telestrated video) showing the various parts of the workout card.  This will be the first of three video tutorials supplementing my previous posts regarding the workout card.

  • Navigating the Workout Card
  • Managing the 4 Day a Week Workout Card
  • Managing the 3 Day a Week Workout Card

Below is the first of these video tutorials, Navigating the Workout Card

Here are my previous posts regarding our Excel based workout program and the workout card

I hope this helps explaining the various parts of the workout card.  If you have any questions, comments, or suggestions, just leave a comment or shoot me an email.  I will reply!

Jeff Floyd – youcandomore1@yahoo.com

How Do You “Skin the Cat” ?

  • “There is more than one way to skin a cat”
  • “There are only so many hours in a day”

Those two concepts are often diametrically opposed when coaching, and in particular when implementing a strength and conditioning program.

powers“There is more than one way to skin a cat” – or get a good workout! There are literally thousands of workout programs out there, and information about them all easily accessed.  Free weights, machine weights, dumbbell, kettlebell,  crossfit, sets, reps, cycles, plyometric,  Insanity, dynamic, Olympic, Core, P90X, this list of options go on and on.   And they are all good, all have benefits, you can get good results from them all.   If you had an endless amount of time (or at least 6-8 hours!) to teach and workout during the day, you could really explore and utilize many of these concepts and equipment.

But…..

“There are only so many hours in a day”.  At least with my athletes that is the case.  The are all in school, many are 2 or 3 sport athletes, some have jobs, they have hobbies,  they are in AP classes, they have to study, they have to sleep, they are involved in clubs and other school activities, they attend church and are involved in our community, and they have their families and social life.

So with those two opposing concepts, the trick becomes deciding what type of program to implement.   Here are the reasons we have implemented this training program (A Weekly (not weakly!) Workout Program) at our school.

  • I believe in it – our athletes believe in it
  • Lineage – The roots of this program, sets, reps, percentages, can be traced back to the work Hall of Fame Strength Coach Boyd Epley has pioneered
  • Individualized – Every athletes workout card is tailored to and based on their strength level
  • Efficient – Using the Workout Card (The Workout Card – Motivation and Efficiency) the athlete does not have to constantly consult a percentage chart.  The amount that they should lift is already calculated and printed on the card for every set/ rep.  They can finish the entire Core Lift part of the workout in 45-60 minutes.
  • Whole Body Workout – Most of the major muscle groups are worked daily
  • Combination of Power (Bench, Squat) and Explosive (Clean, Push) Lifts
  • All sports benefit from the workout.  It is not strictly a “football workout”. (In The Spotlight – Roy Bay)
  • Both Men and Women athletes benefit from the workout. (Training Women Athletes)
  • Flexible – 3 or 4 day a week lifting program (Problem Solving)
  • Flexible Cycles – Each card has a 3 x 8, and 5 x 5, and a 3 x 3 cycle printed on it. (Sets, Reps, and Cycles)
  • Flexible  By changing the supplemental lifts (Supplemental Lifts) you can keep the workout fresh, and tailor it to specific sport or athletes needs.
  • Motivation – Athletes see clearly from the workout card (The Workout Card – Motivation and Efficiency) where they started, and what their current results are.  Each day they enter the weight room with a goal of “breaking” (Breaking, it’s a good thing) on one of their Core lifts.
  • Easy for a Coach (me) to manage – We have over 300 athletes come through the weight room a day.  As coaches, there are only so many hours in the day for us as well.

All of our situations are different.  What works for me, may not work for you.  But it is important to know WHY you are doing what your are doing regarding your strength and conditioning program.  Doing something just because the University of Alabama does it is not reason enough.

Remember – You Can Do More… your brain is lying to you… Don’t Believe It!

Thanks for your questions and comments!

Jeff Floyd – youcandomore1@yahoo.com

All Skate

While editing the Hang Snatch video for yesterday’s post (Supplemental Lifts – Hang Snatch) , I was hit by how many sports were represented in my sampling of raw footage.  I threw together another video showing and labeling these athletes and the sport(s) they represent at our school.

In addition, two of the athletes that have been “In the Spotlight” had great weekends competing.  Roy Bay (In the Spotlight- Roy Bay) won the 100m dash in a large invitational meet on Friday, and JT Hayes (In the Spotlight- JT Hayes) hit a 3 run home run in Friday’ victory.

all skate

I feel fortunate teaching and coaching at a school where all the coaches have “bought into” and believe in the benefits of the strength and conditioning program.

Questions or Comments are always welcome!

Jeff Floyd – youcandomore1@yahoo.com

Supplemental Lifts – The Hang Snatch

snatchAnother lift that we use to supplement our four Core Lifts (Bench, Squat, Clean, and Push) that make up our weekly (A Weekly (not weakly!) Workout) is the Hang Snatch.  The Hang Snatch is a variation of the Olympic Lift, Snatch, and is essentially the same lift except we start from the hang position as opposed to starting with the weight on the ground.  It is an explosive movement that is going to work many major muscle groups – hamstrings, glutes, gastrocnemius, quads, delts, and traps.

We talk about the hang snatch as being a combination of the hang clean and push press.  The starting position is identical to the hang clean, which is the fundamental athletic position.  The finish position is identical to the push press finish, which is the overhead support position.  We teach each position, and then ask our athletes to move explosively from one position to the next.

We use light to medium weight, typically doing 3 sets of 8 reps.  We stress that the lift should be smooth, explosive, almost an “elegant” type of movement.  If it gets too “herky jerky” and slow, we tell the athletes to use less weight.  If it looks bad – it is… use less weight.

Just as discussed in the Squat, and Push Press breakdown, the athlete will begin with a good athletic posture; good base with feet about shoulder width apart and toes pointed straight forward; stand tall with shoulders back and head forward. We use just a slightly wider grip than in the hang clean, with the hands a few inches outside the shoulders, with the bar hanging from straight arms.

To begin the lift, the bar should slide down your thighs as you bend at ankles, knees and hips and (slightly) at the waist. Chest should be tall with shoulders back. Descent of bar should stop at the top of the knees.  Shoulders should be directly over the hands at the bottom of the descent.

As soon as the bar gets to the bottom of the descent (top of knees) the athlete will explode, extending the ankles, knees, and hips. These three joints are linked, as they all will fire at the same time to produce a force great enough to move the load explosively towards the chin.  We tell the athletes to try to jump, drive their hips to the bar and explode the feet off the ground.

After this explosion or jump phase, the athlete will enter the pull phase, shrugging with the traps, and pulling the bar with your biceps and lats.  We tell the lifters to try to “bounce the weight off the ceiling“.  Just as in the hang clean the bar should remain close to the body during the shrug/ pull phase.  A common mistake is to swing the bar out in an arc away from the body.  The athlete will move the weight, in one continuous motion, through the shrug/ pull phase into the overhead support/ finish position “dipping” to catch the bar with bent legs, while fully extending their arms overhead.  At the top of the lift the bar will travel slightly back, with the lifters head moving forward through the “window” that is formed with their arms being the side of the window and bar the top.  To finish, the athlete will stand or squat back to a fully erect position.

We position our spotters as we do with the push press, at each end of the bar.  Because we are using lighter weight than when doing push press, the spotters should not have to assist the lifter moving the weight from the overhead support position, back down to the start position.

Below is a brief video of some of our student-athletes doing the hang snatch during class last week.  It is telestrated, with audio comments included.

As I have mentioned before, the Central College strength and conditioning site is a great source for training videos.  Below is their video of Hang Snatch technique

Questions or Comments are always welcome!

Jeff Floyd – youcandomore1@yahoo.com

Try to See The “Forest” and The “Trees”

We have all heard the idiom “You can’t see the forest for the trees

Yesterday I took out an old file that had some workout cards (The Workout Card – Motivation and Efficiency) dating back to one of the first times we tested our current junior and senior student-athletes. It was interesting to see where this group started before beginning our program (A Weekly (not weakly!) Workout).  It was equally interesting, fun actually, giving those original cards back to those athletes and watching their reactions!  I think often the athletes forget, or don’t realize how far they have come because the strength gains are usually small and incremental.  We talk about the breaking slope (The Breaking Slope) often, and how those small increases over time add up to really big strength gains.  Yesterday it became crystal clear when I gave them their old cards.

As coaches, we are probably guilty of this as well.  We often get so caught up in the minutia of the day-to-day dealings of being a teacher and a coach, that we forget or don’t see all the really positive ways we impact young peoples lives.  Sometimes we forget how far our senior athletes have come, physically, mentally, and emotionally, because we just see that small, daily, incremental growth.  We don’t have the “before and after chart” that makes it easier to see the really big gains those young men or women have made while in your program.

You make a difference. 

I made the chart below comparing the 1RM’s from their initial testing in 2010 to their current (2013) strength level.  I also calculated the percentage increase for each lift for each student, and the total.  You can click on either of the links below to view or download a larger version – or just click on the image to get the PDF version.

2013 increases

The individual total increases ranged from a low of 37% (still a very good increase) to the highest percentage increase of 173%.  The largest percentage increase on any single lift was one student’s Push Press max that went from 80 lbs to 240 lbs – an increase of 200%!

Remember – You Can Do More… your brain is lying to you… Don’t Believe It!

If you get a chance to go to the PrepsKC.com site and “Like” my article from yesterday, it would be appreciated!

Tomorrow I will be highlighting our Softball Coach, Amy Temples, and her off-season program.

Questions and Comments are always welcome!

Jeff Floyd – youcandomore1@yahoo.com

“Sasquatch” Workout

As I have mentioned before, between our strength and conditioning classes during school, and our various off-season programs after school, we have over 300 students a day come through our weight room.  I have also shared that most of the classes and students I have are great.  There are though, without a doubt, varying degrees of intensity and focus (in reference to Coach Courville’s Evaluation of Performance Chart) among the students that train during the day.

sasquatchWe have filmed several training sessions over the last couple of weeks in our strength and conditioning classes.  As I go back and review the video that I have taken, this difference in focus and intensity becomes apparent.  Although I have the camera “rolling” (iPhone with Hudl app) pretty much non-stop, it seems the same students show up on the video each time.  It is easy to “catch them” doing things right, because they consistently come with a good attitude, and train with good intensity – and it shows up on the video.  It also is apparent that we have some “Sasquatch” workouts going on; there are claims that these students have been spotted working out, but they are elusive and its tough to capture video evidence of their workout.

In all seriousness, the use of video in our strength and conditioning program has been a great tool.  If you have an iPhone and use Hudl, I highly recommend downloading the Hudl app.  The video capture is easy and uploading it is seamless.  Once it us uploaded, the editing, telestrating, and viewing functions work exactly like you are used to.

Comments and Questions are always welcome – Join in on the discussion!

Jeff Floyd – youcandomore1@yahoo.com